Showing posts with label container gardening. Show all posts

Monday, May 26, 2014

New use for vintage tub, progress on house and other bits-n-bobs

Dear friends,

After pondering The Great Tub Project, going back and forth on the whole "sell it" or "give it away" or "recycle it" or USE it, I found that it's much easier to USE it.  Who knew it would be so hard to sell a vintage Kohler 1930 tub?  Anyway, once I decided to keep it, the next issue was where to put it and how to support it.

The tub is in really good shape, very little rust, no rust holes, so I didn't want it to just sit on the ground.  I want this sucker to last a while.   After looking into several ideas, finding a welder to make a wrought iron stand (it could possibly stretch or rust out before the tub does), making a galvanized pipe stand (which I loved but would be a lot of labor for ME), I decided to use what I had laying around and make it work---cement pavers with cement blocks.


Using a series of cut-off PVC pipes, boards and a lot of muscles, Rudy (mostly) and I finally got it into place. It was actually a bit easier than I thought it would be. Yes, it's VERY heavy--cast iron covered with porcelain, ya know.


Rudy used his heavy-duty drill and a lot of manpower to drill a series of drainage holes in the bottom.  The original drain is also there at the left-hand end, to provide additional drainage.  I'll put a little screen over it to keep the snails out.  Hopefully.

Another issue I had was -- where to put the thing.  After a lot of pondering, I decided to put it in an under-used corner of the garden, right beside the back/side entrance gate.  That's where most folks show up, anyway.  It's behind bushes, so doesn't look like a dumping ground from the street and we can see it from the patio.  The plan is to sand it a bit, put a color wash on it (not sure what color yet although I do have some other blue planters in the garden here and there) then put a series of plants in galvanized buckets around the front edge to help hide the blocks.

My next job will involve the painting, filling it up with something in the bottom so it doesn't take as much soil, getting the soil, deciding on what to plant (the FUN part), and actually doing it.  I know it will be a combo of herbs, maybe a tomato or pepper plant or two, and some trailing, dangling things to spill over the edges.  And some decorative doo-dads.  Now that it's in place, though, I can take my time with the rest.  Although, I'm very ANXIOUS to get 'er done.  You know how that is, I'm sure.

As for the rest of the house, well, ahem.  We are still working on the ancient plumbing, and I believe this is the last Big Thing we'll have to do where that's concerned.


Yes, my side yard is a shambles now.  But our wonderful superman plumber, Wayne Ging, was very careful not to take out any of the trees or bushes.  We only had to dig up one small lantana and move it.  Now I have to decide what to do with this area. Before the weeds and such see all that bare dirt.

There's an equally bare area in the back yard that was dug by hand by Wayne's assistant (bless you, Rick)!

 AND for those of you who have been chomping at the bit to know what I did with the front porch, here ya are.  Cheap, easy, and effective.  I might add a few hanging-thingies on the walls there, but for now, I'm calling it DONE. WHAT extra front door? :-)


 And wasn't that sweet of the salvia to start blooming just for the photos?

Oh, and for the plumbing geeks here, here's our new faucet, made of freeze-free PEX flexible pipe, insulated (stake to come). No longer will I have to go through the winter without garden water! It seems silly to be jazzed about faucets, but once you haul a 100-foot hose around for three years from ONE faucet, you appreciate having them here and there.  We added three new ones.  Woohoo, luxury!  LOL


 Next up---painting the north side of the house.

Happy trails!

bobbi c.


Monday, September 10, 2012

Texas fall gardening & things I've learned

Dear friends,

As I wander through the garden, taking photos of the container garden, some strange plants and my greenhouse teardown, I can't help remembering how it all looked last year at this time.  We had only had the house for a few weeks before I built my first raised bed garden.  That seems to always be the first thing I do, even before all the clothing and such are unpacked.  Here's a photo from our first raised bed, taken last July.


Since then, I've built four more beds using cedar fence pickets and my "So Easy it's Stupid" garden bed design.  Over the last year, I've learned a huge amount about our blackland prairie soil, including--it is magic dirt, but don't step in it when it's wet.


I've learned that the phrase *eight hours of full sunlight* shouldn't be in any Texas gardener's vocabulary.  I've never seen plants grow so well as under the shade of these ancient pecan trees.

And speaking of pecans!  We're keeping our fingers crossed for a good harvest this year.  It's lookin' good so far. (Basil the Squirrel is keeping a close eye on the situation.  BTW, he says howdy!)


I've also learned that veggies love galvanized metal containers.

Squash, basil and scallions grow well in this raised tub garden
Bell peppers, pimento peppers, eggplants grow well in the shade of the pecan tree
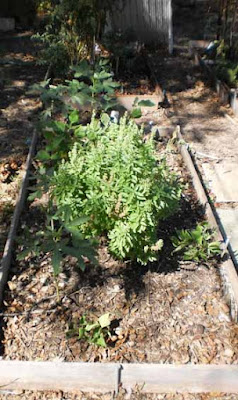
I've also learned the identification of some Texas natives that popped up in the yard (such as peppervine), but that new things keep coming up in this drought.  Here's a still-unidentified plant.  It was there last year, but never bloomed.  It doesn't seem to be invasive, but maybe that's because it never bloomed.  LOL.  It's much happier this year.


Another thing I learned---when building garden structures, the slope of the roof is probably the most important thing.  Apparently the builders of my beloved greenhouse shed weren't too careful with that rule.  When we bought the house, we noticed a bit of mold inside the greenhouse, but assumed it was from lack of ventilation.

After the greenhouse roof collapsed, though, we knew there was a larger problem.  Up until now, I've alway said that the phrase "It's a teardown" was NOT in my vocabulary.  Well, ahem, it seems that it is.

The whole front wall of the greenhouse is rotten, filled with horrible skulking creatures (including albino roaches),  termites AND nasty black mold.  NOT good for somebody like me who has severe mold allergies.

The plan is to replace is with an open top trellis.  The concrete floor will become a patio of sorts.  I like that idea, but didn't like the idea of tearing down the whole structure.  Luckily, the original pine shiplap siding was underneath the OSB that covered the interior walls (outside wall of garage).  Not so luckily, it was covered with old vinyl siding and foam sheets.

 
Original siding underneath vinyl

After the roof is removed

Wood rot

It just gets worse

I'm still not sure where I'll put all my potted plants over the winter.  The reason why my peppers are so large is that I was able to over-winter them in the greenhouse.  

I also learned that there's yet another type of antique pine siding underneath the vinyl on the cottage---it's the wider type.  You can see the old vinyl (the narrower stuff).  Under that is a layer of foam they used as a nailing surface, then under that's the original wood.  And it's in great shape--as far as we can see.


Then again, who knows?  I sure don't want any more surprises.

Happy trails from a slightly cooler Texas!

bobbi c.

Wednesday, May 9, 2012

Heirloom Seeds Resource Guide

Dear Friends,

I just added a few new pages to my blog.  If you look up under the green title bar, you'll see a list of links to special pages here.  One that I'm working on is a guide to heirloom, antique and non-GMO seeds.   As time goes by, I'll be adding to this list.  Do you have a favorite seed company that specializes in either organic, heirloom, open-pollinated or antique plants and seeds?  If so, let me know about it and I might add it to my list after I check it out.


I've also added a short article on How to Dry Herbs in the Microwave, a list of links to Container Gardening information on this blog, and one of my funny Garden Stories ( so far).

I hope this information is helpful to you as you design and plant your garden!

Happy digging!

bobbi c.


Friday, September 28, 2007

New gardens

Dear earthly gardeners!

I'm back, this time with photos from my new garden space. Our gorgeous home in the country is on the market now. For information, click HERE.

My gardens there have been in progress for the last twelve years. It's a bit overwhelming to start over, especially since our new house has almost nothing but crabgrass, Devil Bermuda, and one oak tree. I've been busy, though, and now we have some shrubberies, some herbs, some native Texas plants and a tiny little patch of green beans in the backyard.


Behind the beans, you can barely see my new fig tree, grown from a cutting I took from the tree in my old garden. I was surprised how easy it was to get a cutting to grow.

The backyard is still a blank canvas, so to speak, but I do have a lot of plants in pots. I still have my EarthBox that I talked about in this post, and I have bell peppers, more green beans, lots of herbs and Texas native plants also growing in pots. They really seem to like the somewhat cooler temps here in town, as well as the intermittent shade the oak tree provides.


I really love container gardens, and even when I have my permanent growing beds in, I still plan to do more gardening in pots.

Oh, and here's a photo of a visitor to the new garden, something I never saw at the other one.....a green anole, trying like hell to blend in with the BBQ grill!


Until next time, Dig It!

bobbi c.

Tuesday, May 1, 2007

Great garden magazine, Mother Earth News

The Earthly Gardener by Bobbi A. Chukran
February 14, 2007

Dear friends,

I picked up the current issue of Mother Earth News magazine the other day, and this particular issue is chock full of great articles. It includes a great article about how to grow tomatoes all year long, how to grow cherries and asparagus, and an especially important feature on “Real Food…Why Growing Your Own is Best.” Pick it up on the newstand, check it out in a library, or subscribe. I find it a valuable resource for organic gardening and general DIY projects.


Thanks to Susan from my Writing the West writing group for her tip about using a heat mat. She says that she uses one in CO when starting tomato and basil seedlings, and that the extra heat underneath the plants makes for a stronger root system. Thanks, Susan, I’m going to add a heat mat to my “things I have to have” list!

Speaking of things I have to have, I finally bought an Earthbox this weekend. I’m looking forward to using it and testing it here in my garden. An Earthbox is a container gardening system, self-watering and highly efficient.

Dig it!

bobbi c.
Copyright ©2007 bobbi a. chukran.

Monday, April 30, 2007

EarthBox–How to Grow your Own Herbs, Flowers or Vegetables without a Garden

The Earthly Gardener by Bobbi A. Chukran

I mentioned a while back that I had bought an EarthBox for my birthday. I finally got around to setting it up last weekend, and so far, I’m very happy with it. The EarthBox is an ingenious system that’s sort of a hybrid hydroponic/soil-based system, that allows you to grow flowers, herbs or vegetables anywhere. These are especially good for folks who don’t have a real garden….people who grow things on balconies, patios, decks, places where the soil is bad or non-existent, etc. It’s basically a large, self-watering container garden.

I got the terra cotta colored one (it also comes in dark green), and it fits in well with the other clay pots and objects in my garden. The idea behind the EarthBox is that you fill the bottom with water, insert a screen thing, then fill the rest with any potting soil. I used two bags of organic potting soil I found at the local garden center. You add a line of organic fertilizer (provided with the box) along the top of the box, put on a plastic “mulch” over the top, then cut holes in that and plant. The plastic fits over the top snugly like a shower cap, with elastic around the edges. The fertilizer will last all season; you don’t have to add more until after the harvest.

After a while, you do have to add water (through a convenient pipe that sticks out the top) but there’s an overflow hole so you never over-water. That’s always a problem with tomatoes. We had a hard, driving rainstorm, and the whole thing, including plastic mulch top, is still intact. I have mine sitting out in the front garden by the porch. It has casters on the bottom so you can roll it around easily. I wish I could put it up on the wooden porch, but that area just doesn’t get enough sun.

The two plants I put in the EarthBox last weekend already look better than the two I planted out into the garden several weeks ago.

It’s raining now, but eventually I’ll get some photos and include them here. I love experimenting with new garden “systems” and am curious to see how this works for us. The EarthBox website has more information, and a great forum there for folks who use these in all sorts of situations.

The only thing I didn’t like about the EarthBox was the fact that I had to stick my hands through the holes in the plastic mulch to plant the tomatoes. I would much rather plant, then add the mulch over the top, but I see why that wouldn’t work so well unless you were very careful. Also, I used large plants….using smaller seedlings is recommended, and would be much easier to deal with, too.

Some online users have expressed dismay at the customer service when ordering directly from the company. I bought my box at a local garden center, so that wasn’t a problem for me. I would suggest calling or e-mailing the company to make sure the boxes are in stock before ordering.

There are lots of links online to alternatives to the EarthBox. Just do a search for “self-watering containers” and you should find plenty of information and ideas.

dig it!

bobbi c.

Copyright © 2007 Bobbi A. Chukran. All rights reserved.

Video on How to Plant in Containers

april 16, 2007 by bobbi a. chukran


Mornin’ earthly gardeners,

Saturday was cold and windy, so I had a chance to poke around online. I found this nice introductory video about planting in containers. They say a picture’s worth a thousand words, right? Well, I say a video’s worth a million words!

Here’s the direct link to the video. CLICK HERE. It’s short and loads fast and has links to several other related videos.

I like planting in containers because I can be creative with my garden. You don’t have to use the same ol’ same ol’ terra cotta pots. Here’s an old iron cauldron that we bought from a roadside junk dealer. I’ve planted catnip, elephant’s ears and a variety of small bulbs in it. It sits right by the front porch and is green year round! And I can add a few annuals around the rim if I want, for more color.


I’m feeling a trip to the garden center coming on. How about you?

dig it!

bobbi c.

Copyright ©2007 bobbi a. chukran.